Clean Hardwire Dashcam Install in a 2010-2013 Mazda3
I looked around the webs for hardwire install instructions, but all the guides I found went to great lengths to avoid removing the A-pillar trim. The side curtain airbags are located in the A-pillar, and so the trim piece is held on with a tethered clip to keep the trim from being launched at the driver’s face when the airbag deploys. While it’s possible to do this installation without removing the clip, it’s much, much easier to simply cut the clip and replace it with a new one.These pictures were taken in a 2010 Mazda 3, but will work on all 2nd Gen (2010-2013) models, and should also work on 3rd Gen (2014-) models but I have not verified this.
Disclaimer: I am not a car mechanic. If you follow these instructions and as a result damage you or your car, you have no-one but yourself to blame.
Shopping List
- Dashcam – I used a Mini 0806.
- Micro USB 12V-5V power Supply. (Some cameras need mini-USB instead)
- Low-Profile Mini Fuse Tap.
- Micro SD Card – each hour of video needs about 8GB.
- A-Pillar Tethered Trim Clip, Mazda Part Number D651-68-162A. Cost is $7.50 CAD.
Preparing the Wiring Harness
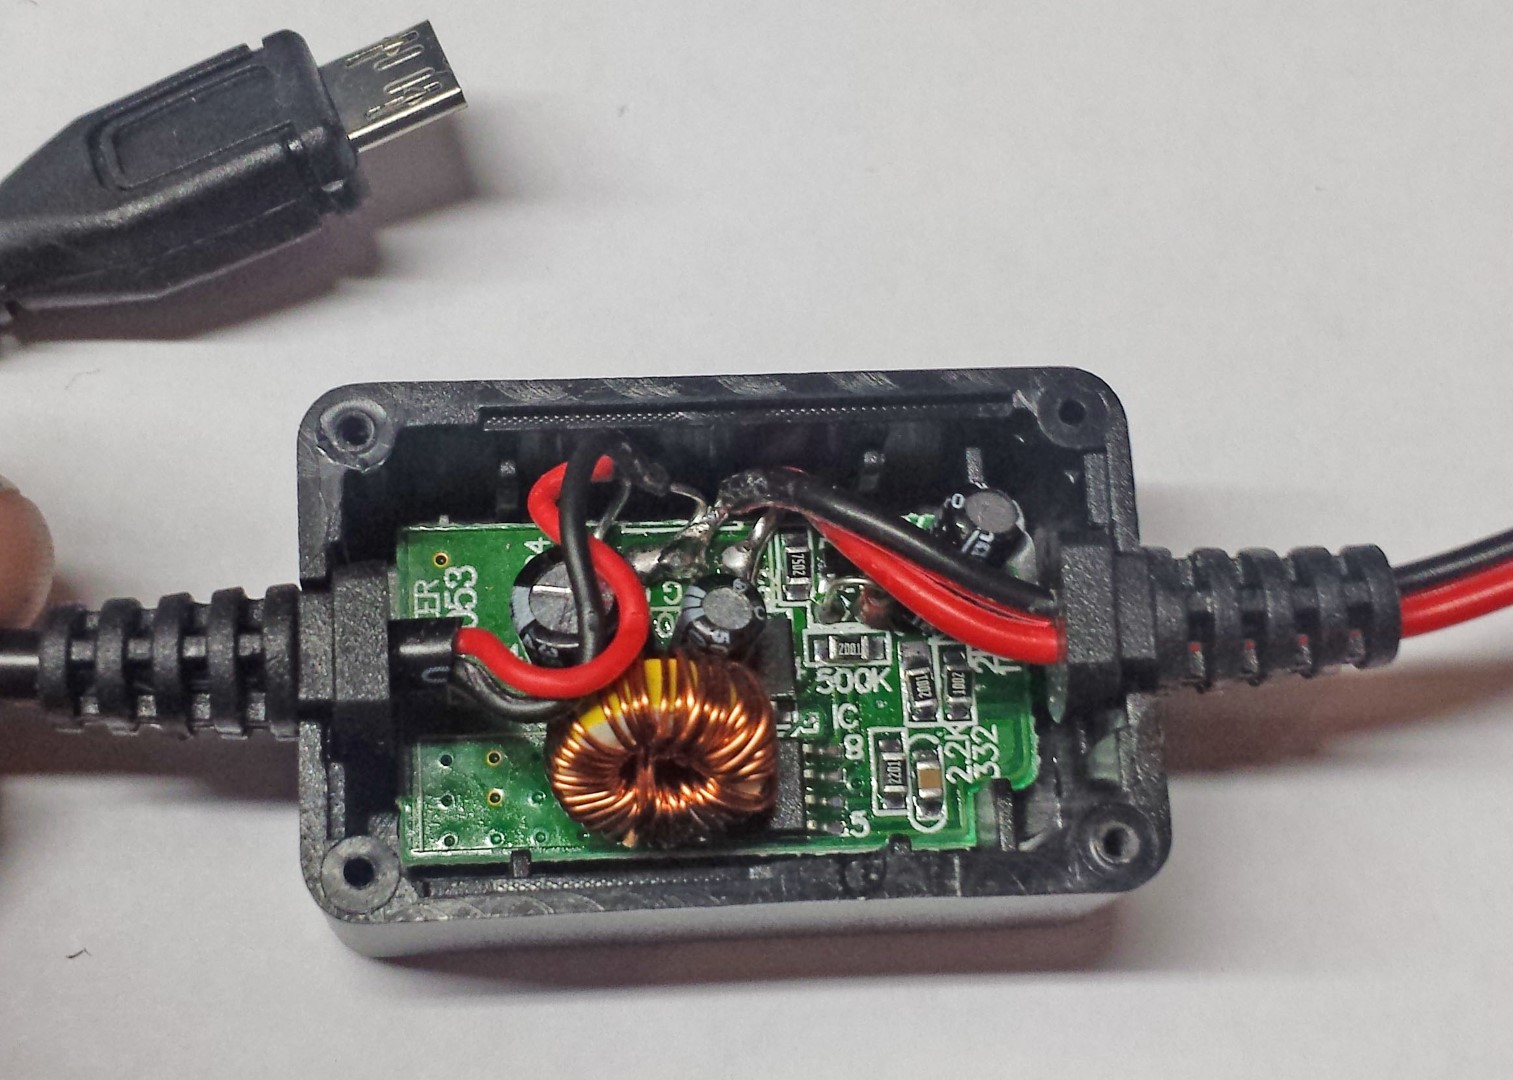
The build quality and labeling of the power supply didn’t immediately inspire a lot of confidence. Having it ignite while I’m driving would be bad, so I decided some further investigation was warranted. The enclosure was just screwed shut so it was easy to open and examine. If you buy one of these, and it looks like mine, I suggest sending it back for a replacement.
The insulation on the positive lines was stripped back much too far, leaving too much of a risk of those conductors shorting. The rest of the pcb assembly was pretty terrible as well, with a cheap inductor, and misaligned components, but nothing that looked immediately dangerous.

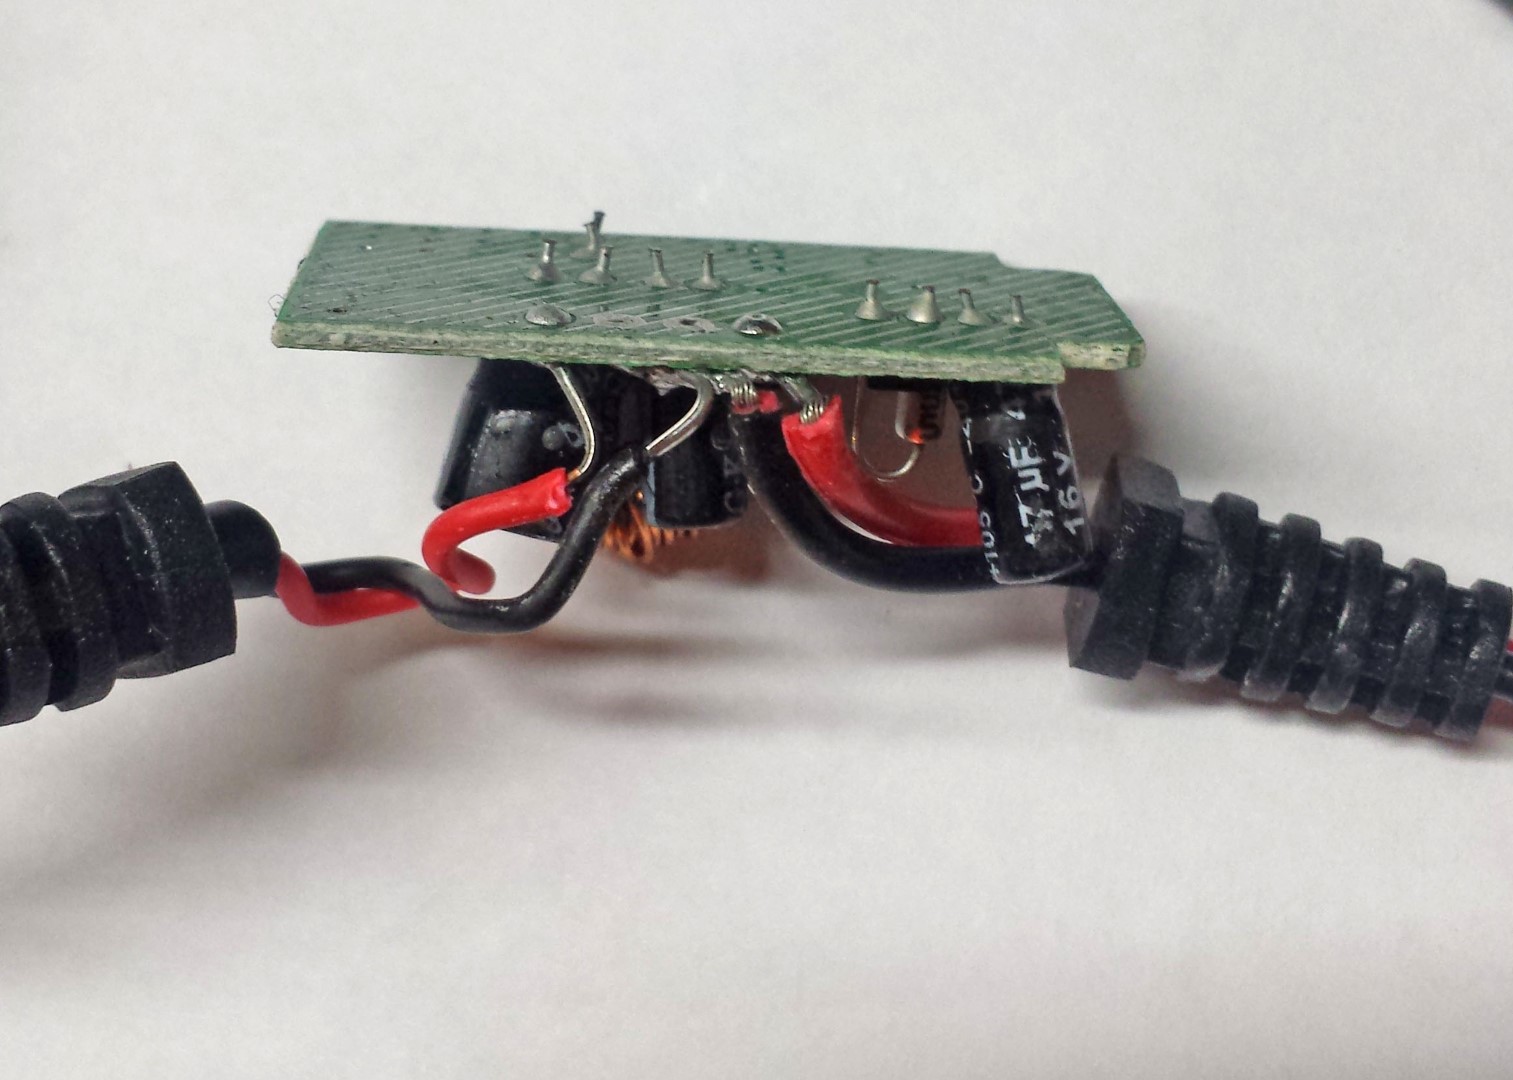
I re-soldered the contacts after cleaning up the old solder and re-stripping the wires to a more reasonable length.
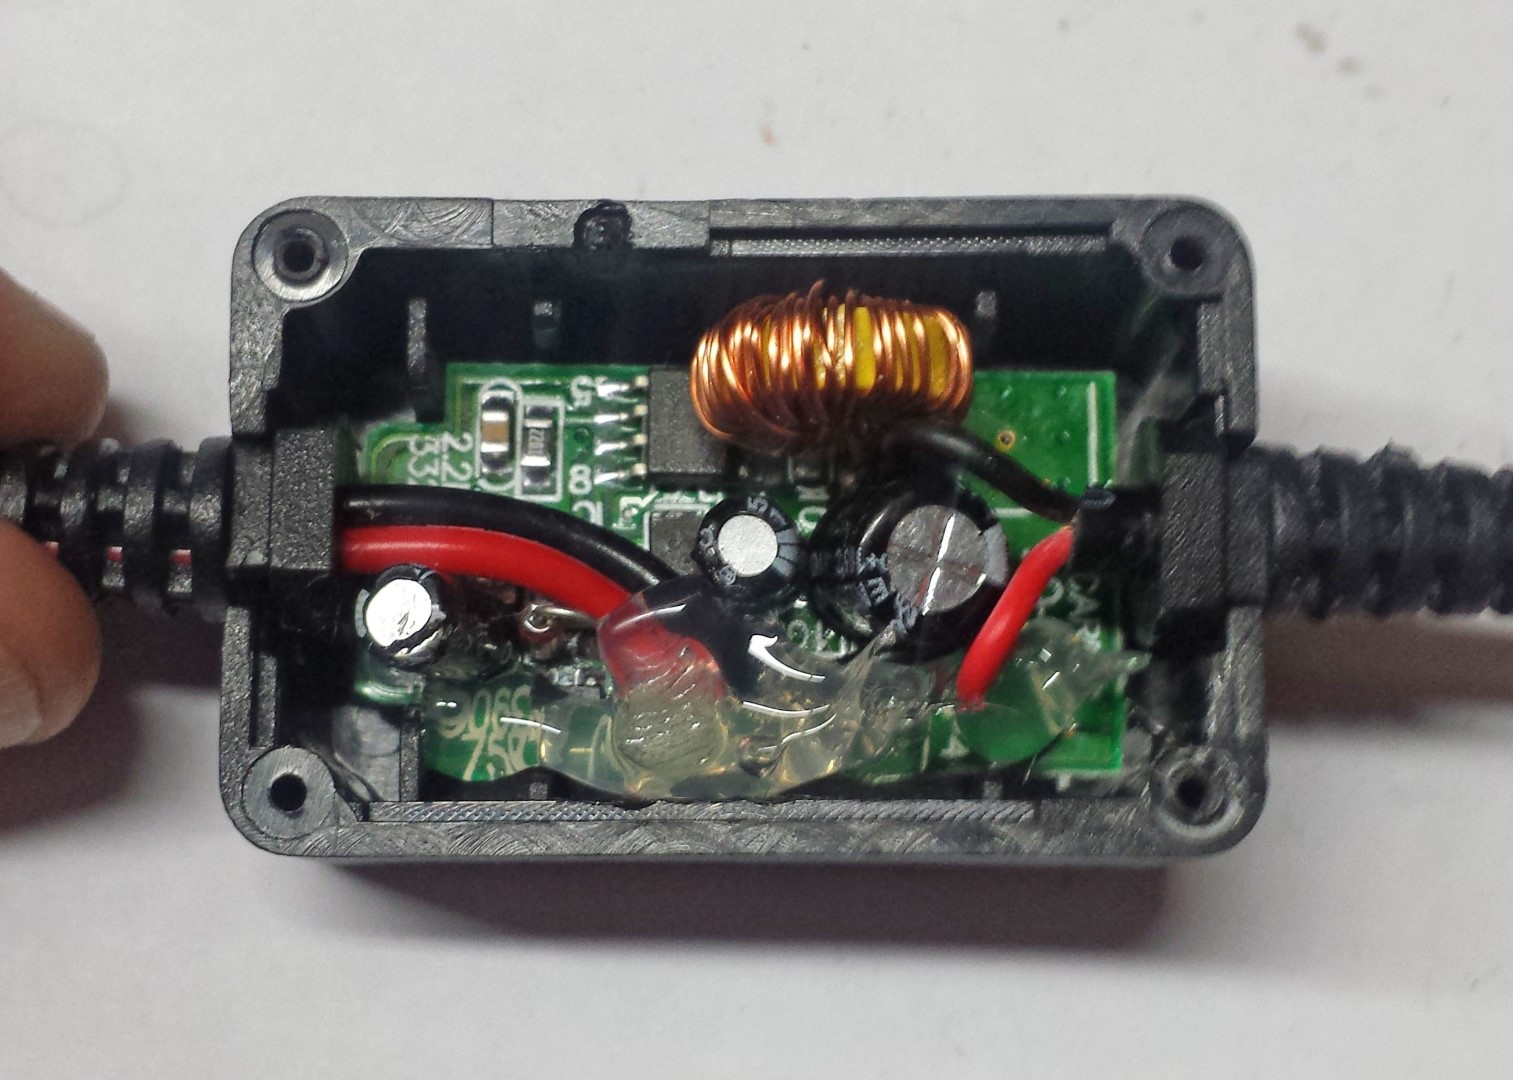
With the board back in the enclosure, I also added a bit of hot-glue to strain relieve the wires and make sure nothing shakes loose.
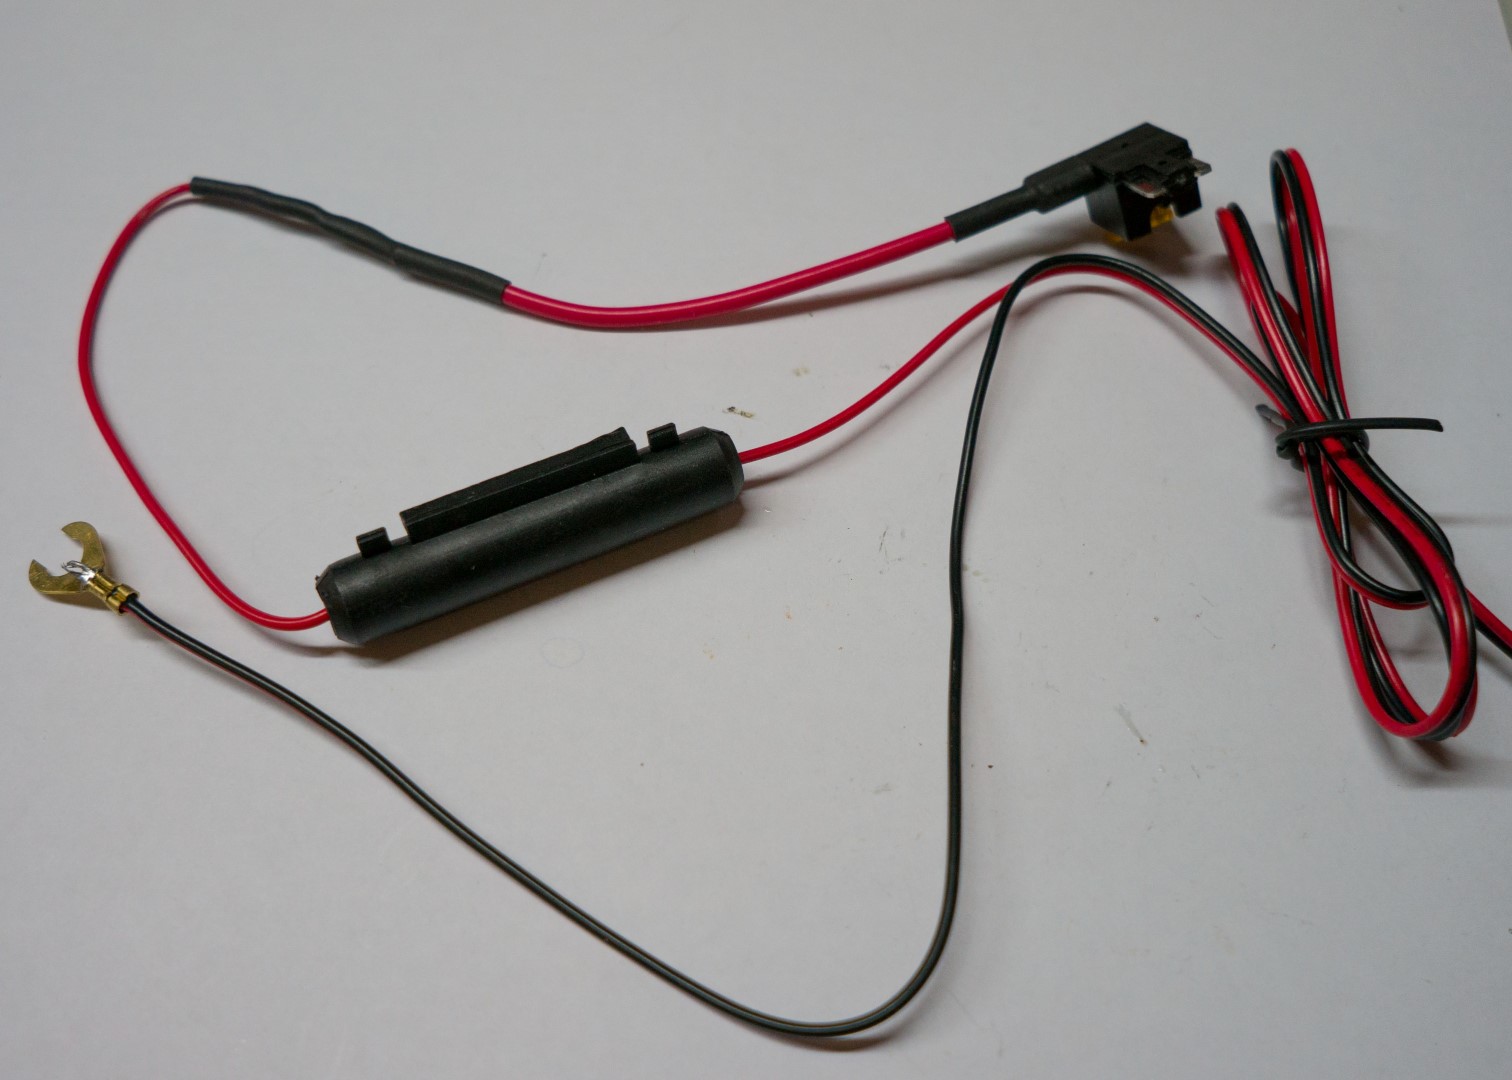
The fuse holder comes with a female crimp butt connector pre-installed, but I prefer to have everything soldered, so I clipped off the old connector and soldered the fuse holder to the lead from the power supply.
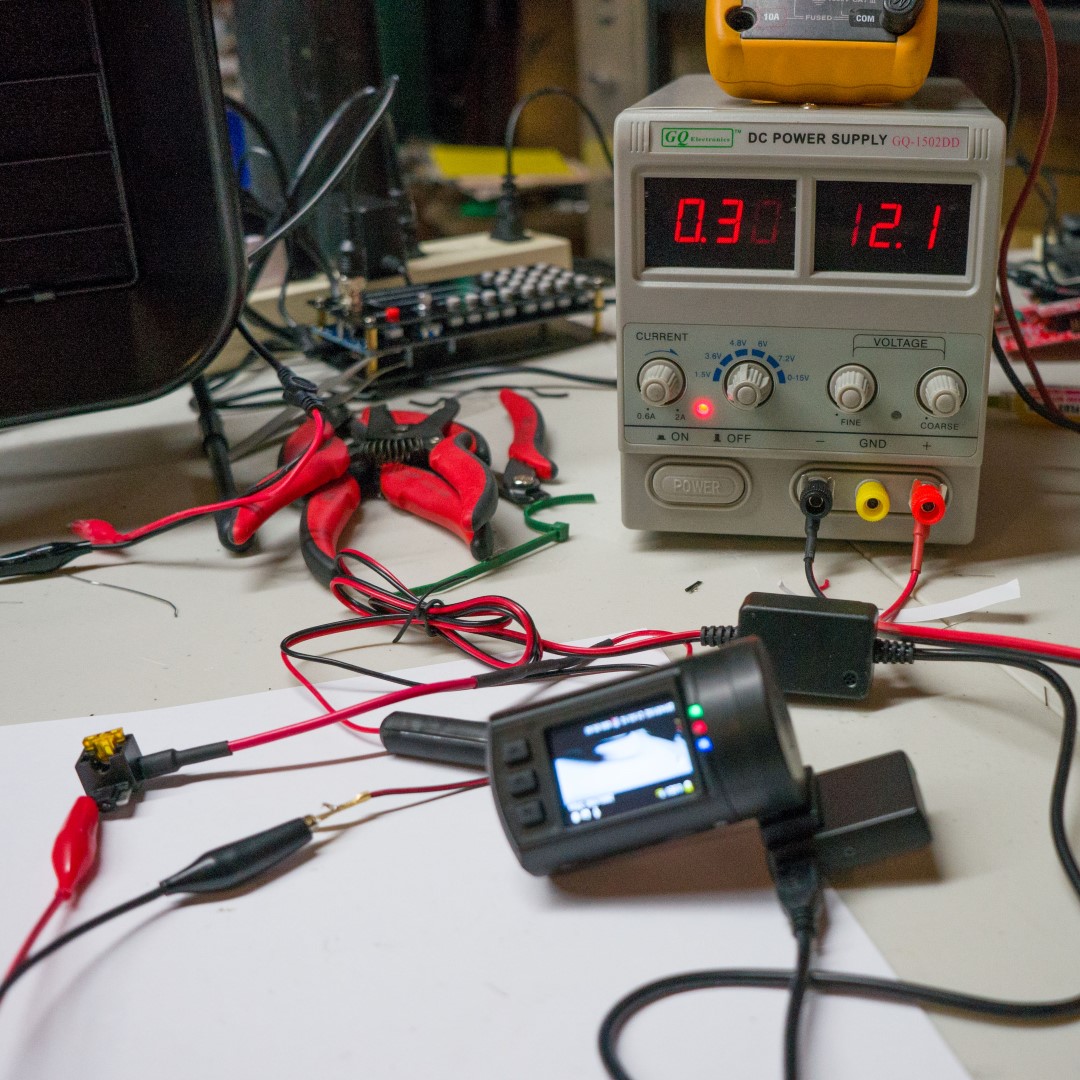
With the harness completed, I did a bench test of the whole circuit. The camera worked properly and was drawing 3-4 Watts.
Installation
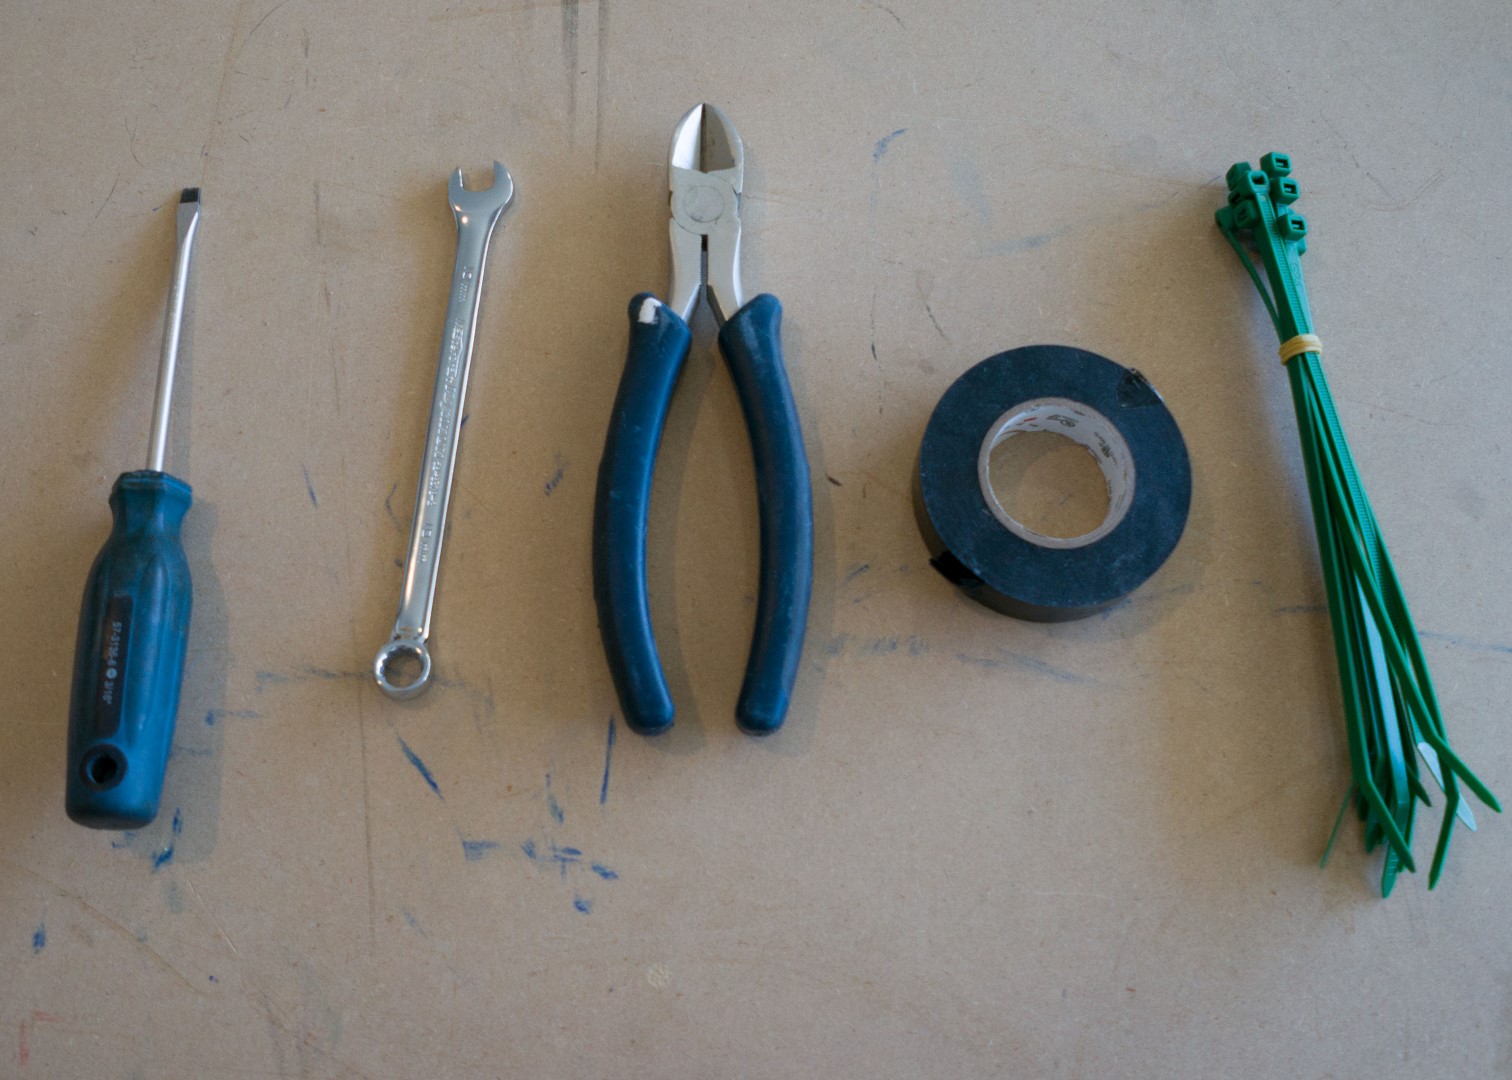
Tools Required
- Flat Head Screwdriver
- 10 mm Combination Wrench
- Side Cutters
- Electrical Tape
- Wire Ties
Disconnect negative battery terminal. This is to make sure the airbag doesn’t blow up in your face.
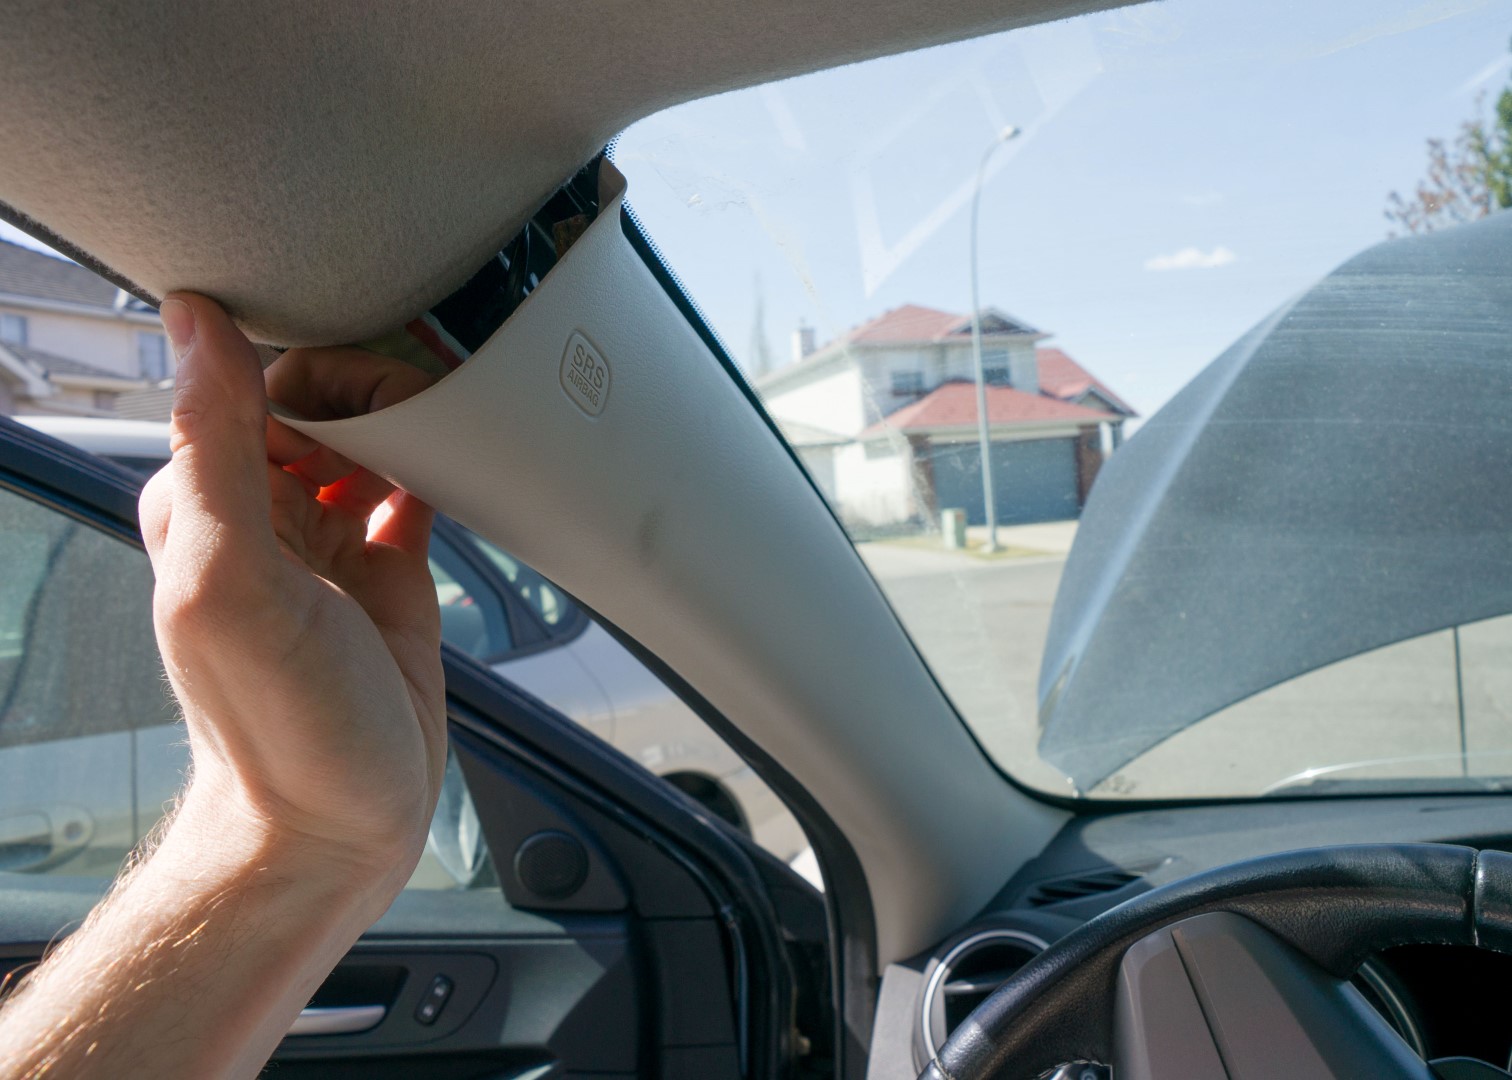
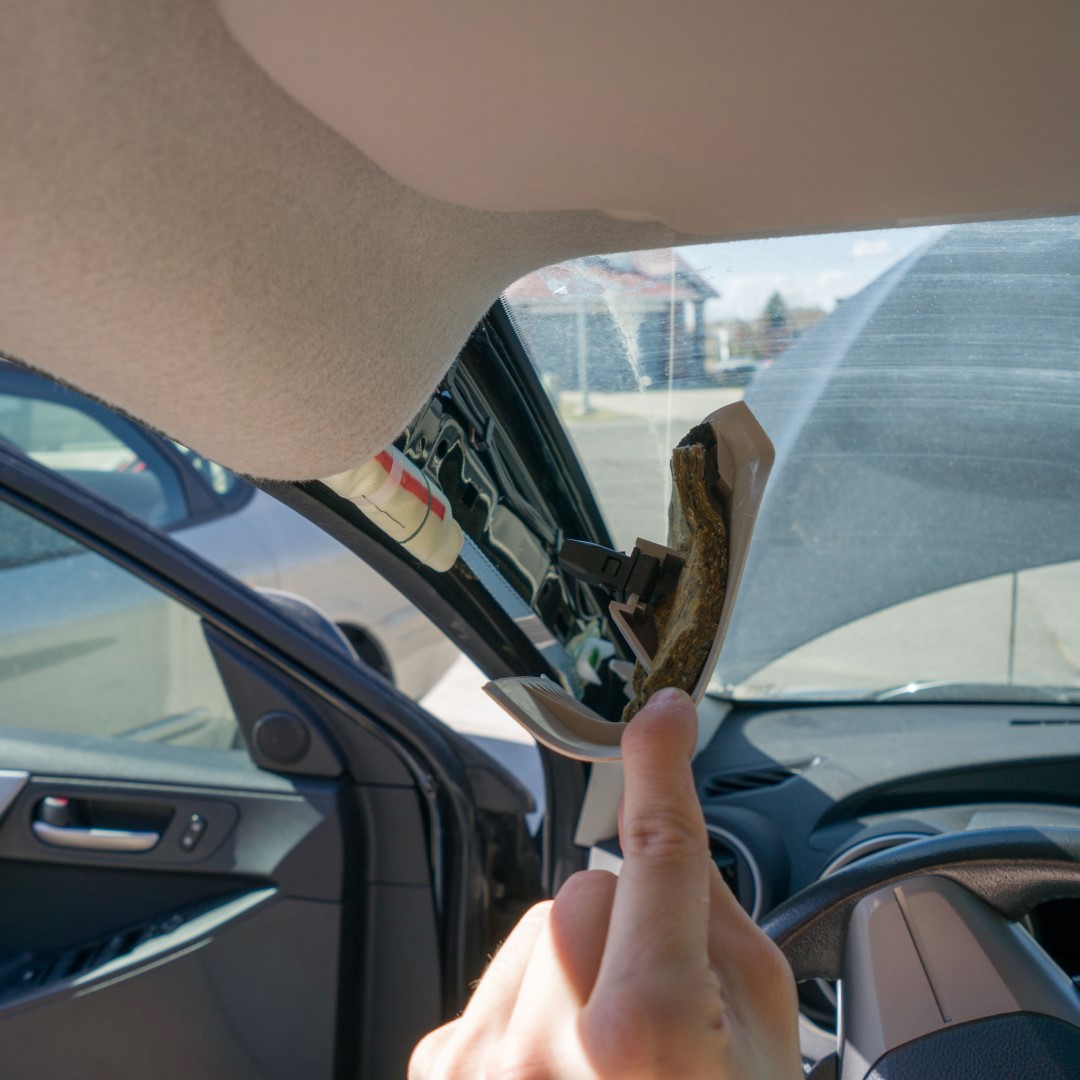
Pull the A-pillar trim from the top. It should come free with a good tug.

Cut the A-pillar trim tether. It’s a black plastic strip about 1/2″ wide.
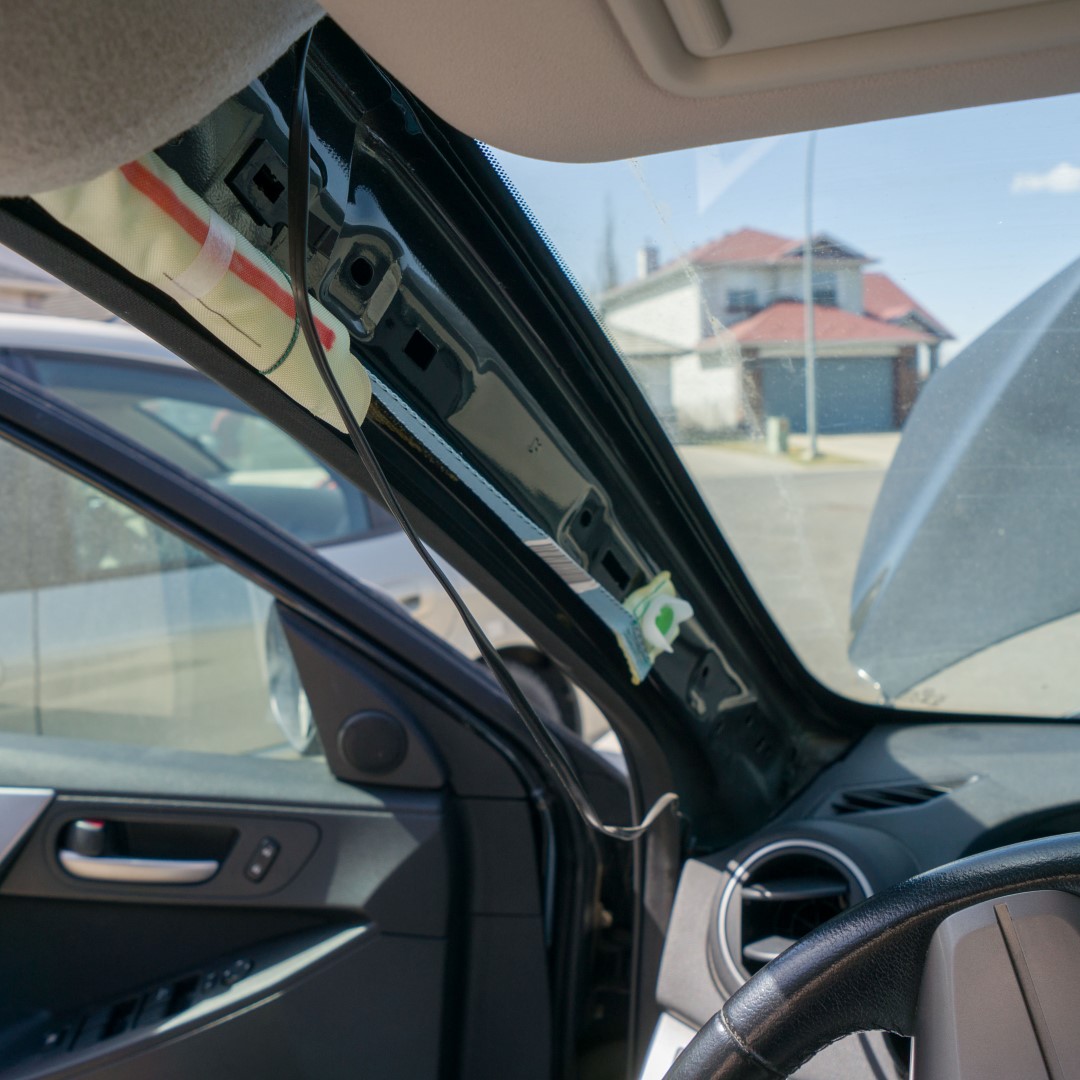
With the trim clip cut, the trim piece should easily pull free of an additional clip near the bottom, and then lift out from the dash. The wire routed directly over the rolled-up white side-curtain airbag in this photo was put there by the person who installed the remote-start antenna in my car. Having something routed over an airbag is an obviously bad idea, so don’t do that. The airbag is also why it’s necessary to pull the trim, rather than tucking the cable under the left edge of the trim.
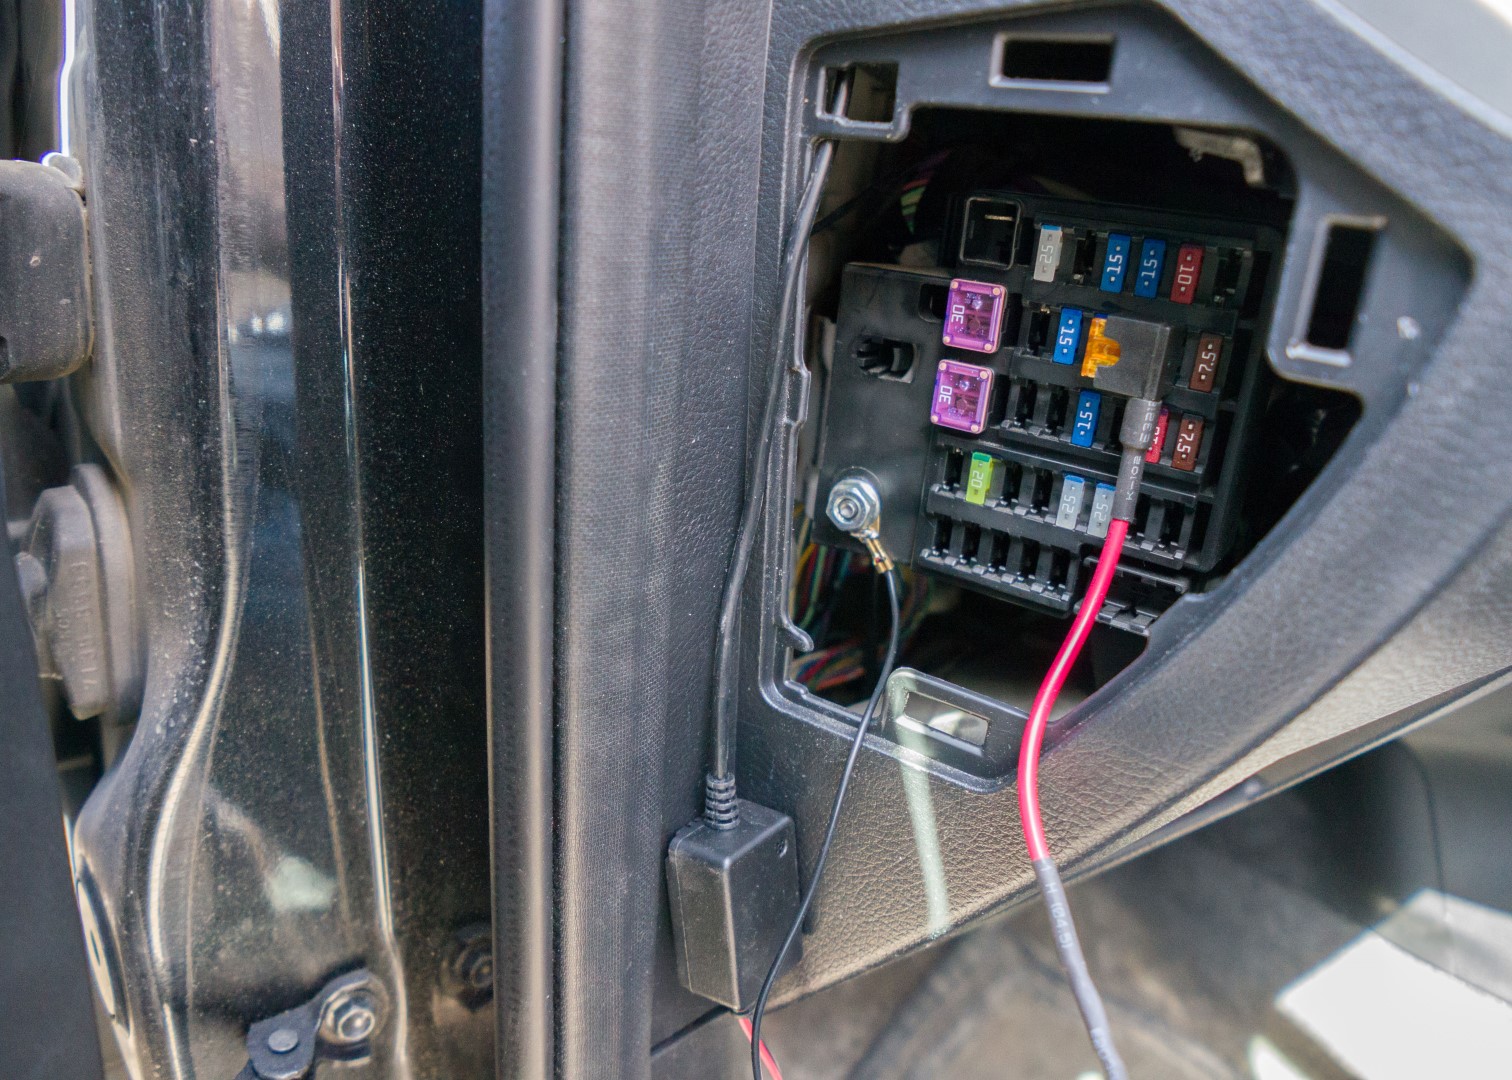
Use the flat-head screw driver to pop the cover off the cabin fuse box, and route the cables from the fuse box through to where the dashcam will be installed. The image shows where a very large passage is available from the A-pillar to the fuse box.
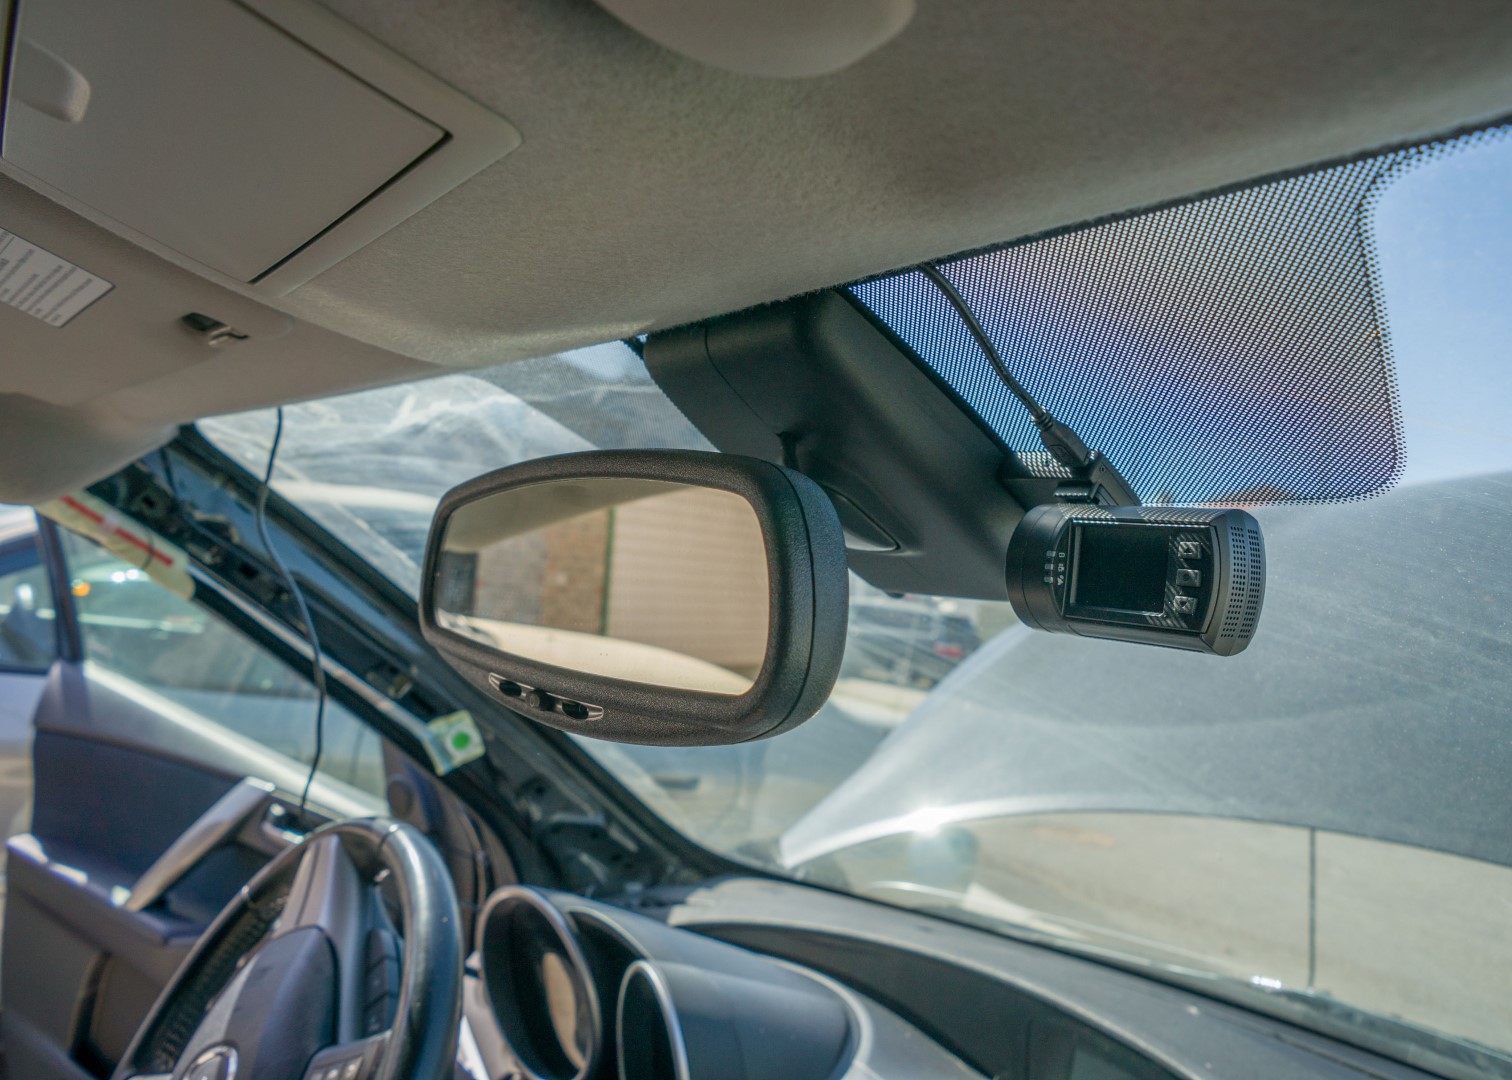
Install the camera in your preferred location using the adhesive pads included with the camera. I cleaned the glass with some isopropyl alcohol first.
Plug the USB connector into the camera, and tuck the usb cable into the headliner, be careful not to pull the headliner too far away from the roof. The cable can also be routed down the A-pillar. My camera came with some adhesive wire clips that were helpful for this part. Make sure that the cable stays on the windshield side of the airbag and trim clips when you do this.
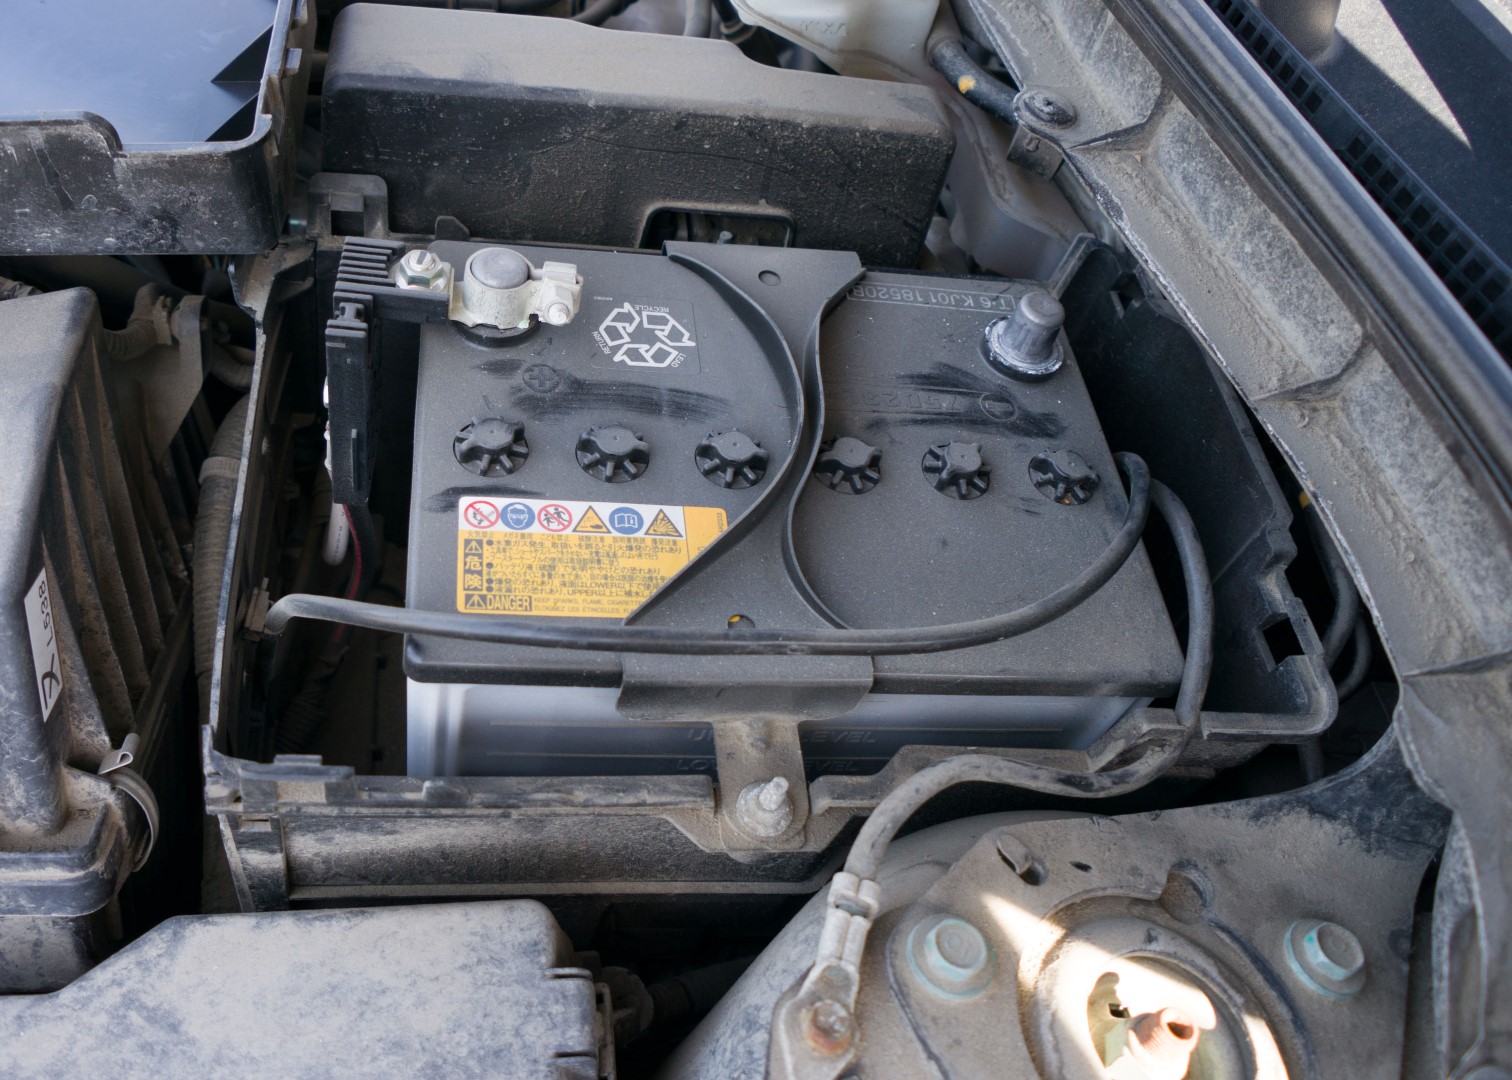
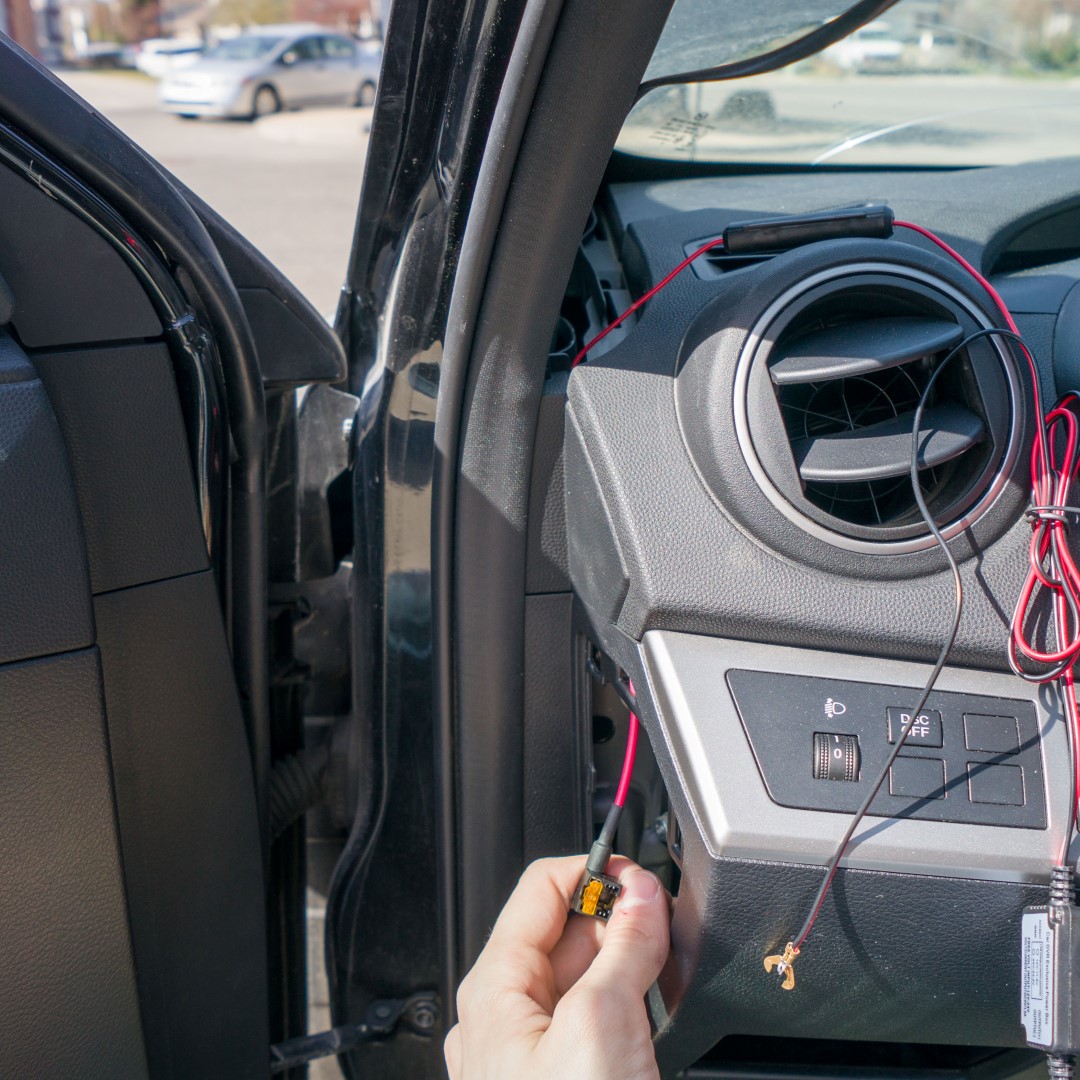
 Choose which fuse you want to tap and remove it; there’s a guide on the back of the fuse-box cover. Be very careful not to drop the fuse when you pull it out because it will fall into a large void below the fuse box (oops). I chose the power for the auto-dimming mirror. Note that the center-console power socket is always on, so connecting to that will slowly drain your battery when your car is parked. The stud and nut on the side of the fuse box can be used for the ground connection. Loosen the nut with your 10mm wrench, and secure the forked crimp connector in place.
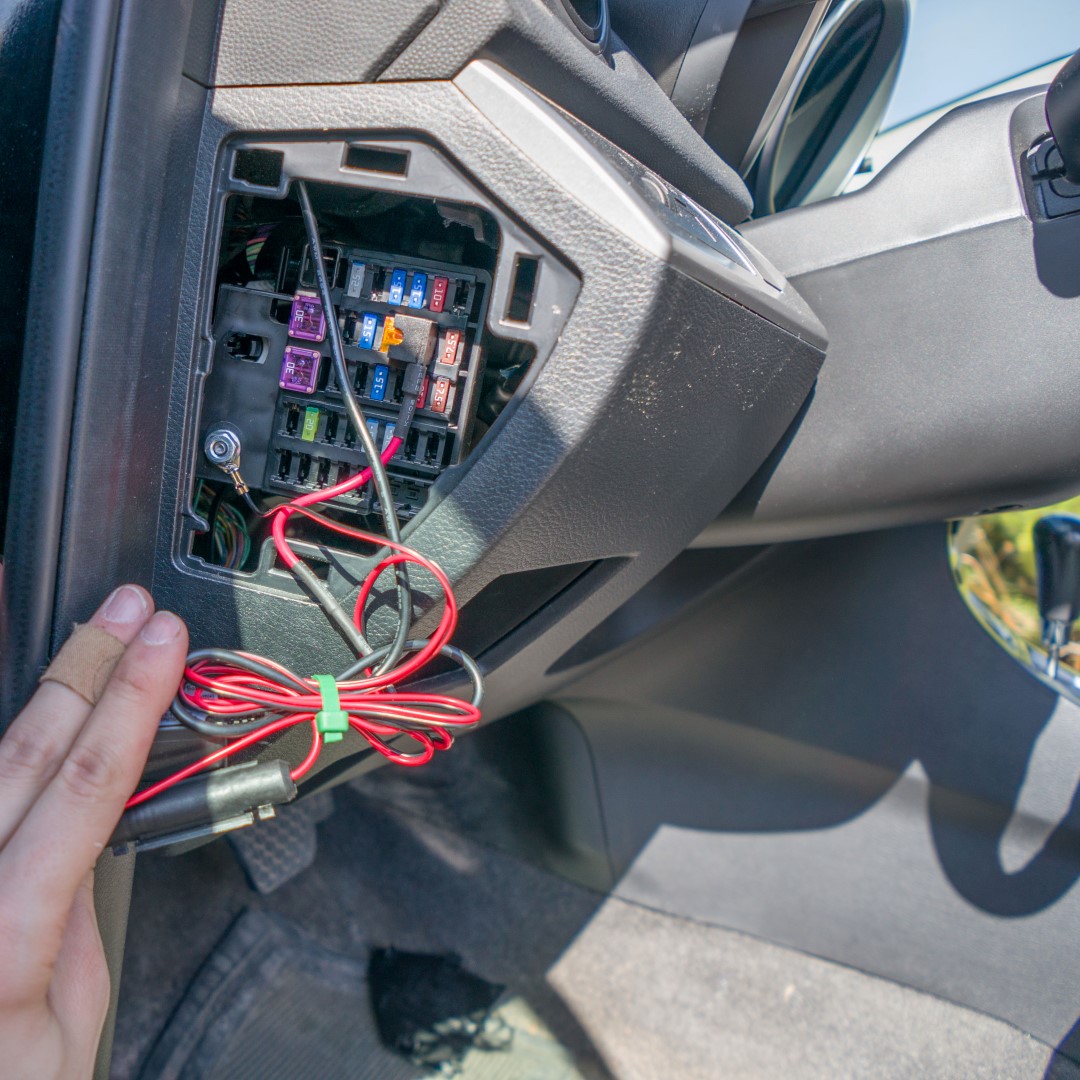
Bundle up your the extra cable and secure with cable ties. I also wrapped the bundle in electrical tape to prevent rubbing. The bundle can be tucked into the air-space above or below the fuse box.
Slide the old trim clip from the A-pillar trim piece, and use the screw-driver to lever the trim clip socket from the A-pillar. Put the new clip onto the trim piece. You do not need to open the trim clip. Reinstall the trim onto the A-pillar, and make sure that the trim clip grabs the recess in the pillar. Close up the fuse box, reattach the battery lead, and take it for a test drive!